1. What on earth is a Washlet?
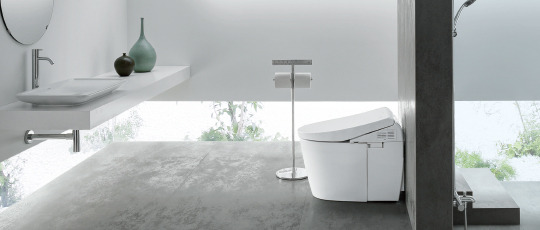
A lot of public and home bathrooms in Japan have high-tech toilets with bidet units in them, among other functions. This kind of toilet/bidet combo is called a "Washlet", which is a portmanteau of "wash" and "toilet". You are not alone if you've ever been bewildered by them, searching endlessly for a flush mechanism and sometimes, embarrassingly, not finding one.
Sometimes there is a control unit on the wall with lots of buttons. Sometimes the control unit is on an arm attached to the side of the toilet. The functions are all more or less the same, no matter where the control unit is. Let's go over these functions.
2. How to use the bidet unit
Whether the toilet you're using has a wall-mounted control unit or a control arm, the symbols and vocabulary will be pretty universal. Here is an example of a standard control panel. First we'll go over the bidet functions:
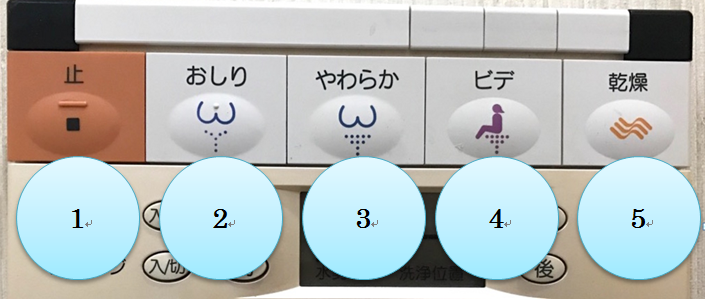
The top row of buttons controls the jet nozzle and dryer (not all Washlets have a dryer).
The red button is to stop the water jet.
The next button (number 2), is a standard jet of water for rear washing.
The next (number 3) is a gentle jet of water for rear washing.
Number 4 is a gentle jet of water for front washing (advertised for feminine use).
The last, number 5, is for the dryer. Here is a vocabulary chart for reference.
| No. | Japanese | Romaji | Function |
|---|---|---|---|
| 1. | 止 | — | stop |
| 2. | おしり | oshiri | rear wash |
| 3. | やわらか | yawaraka | gentle rear wash |
| 4. | ビデ | bide | front wash |
| 5. | 乾燥(感想) | kansou | dryer |
How about the control panel below?
The illustrations depicting Washlet functions are different from the image above, but the functions are exactly the same.
In addition to the above basic functions, there are also buttons for water strength and temperature, and seat temperature. Let's take a look at those now.
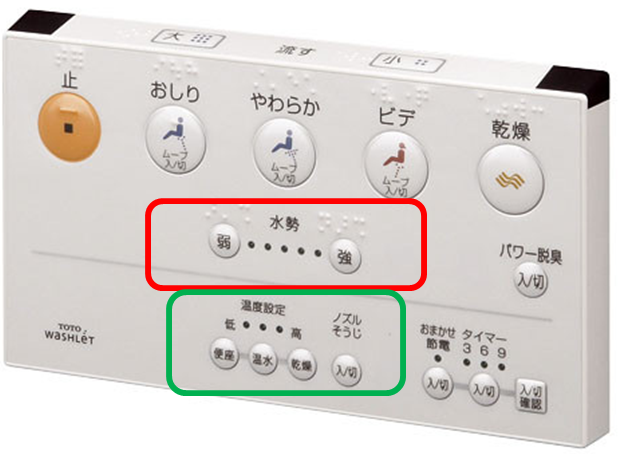
The buttons in the red circle are for water strength. The left button is to reduce the water strength, and the right button increases it. To increase or decrease the water strength, simply press the appropriate button until the indicator light for the strength you want is lit up.
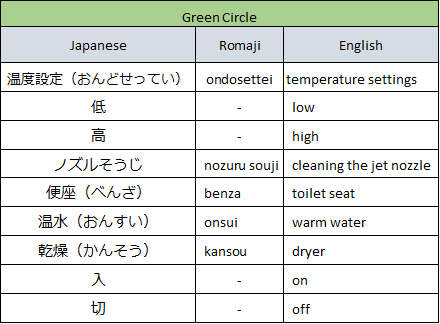
The buttons in the green circle are for seat temperature, water temperature, dry temperature, and nozzle cleaning. This gauge functions a little bit differently. If you want to adjust the seat temperature, for example, simply press the left button. The indicator light will light up to where it is currently set.
Simply press the button to move the indicator light to a different temperature, and stop pressing when the temperature you want is lit. As a general rule, lower temperature will be on the left and higher temperature will be on the right.
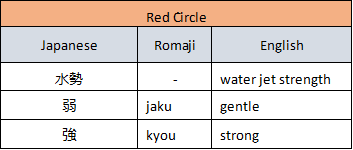
Here is a vocabulary chart for reference. Feel free to download or print it.
3. That's great and all, but how do I flush the damn thing?
There are a number of flushing mechanisms you will encounter. Sometimes, the flush button is on the wall-mounted control unit. Let's take a look.
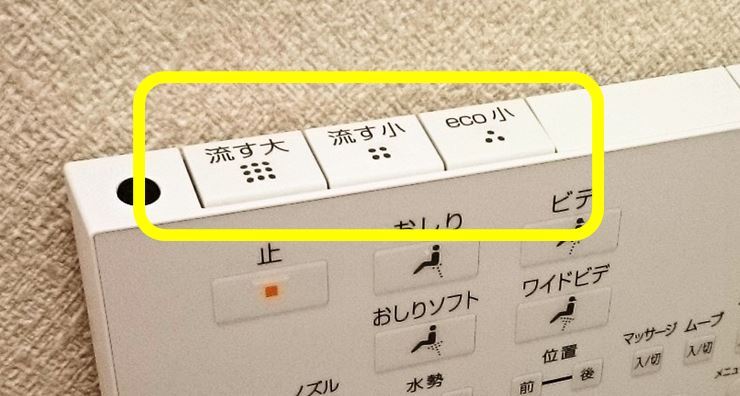
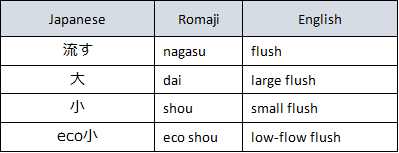
Sometimes there are up to 3 flush buttons. The first one on the left is the strongest flush. This is typically used only when you make a bowel movement. The middle button is a small flush. The button on the right is a low-flow flush. Do not use this flush after a bowel movement or if you used a lot of toilet paper (e.g. during menstruation).
Here is a vocabulary chart for reference. Feel free to download or print it.
4. Other types of flushing mechanisms
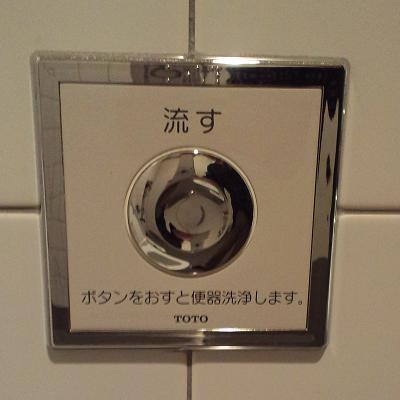
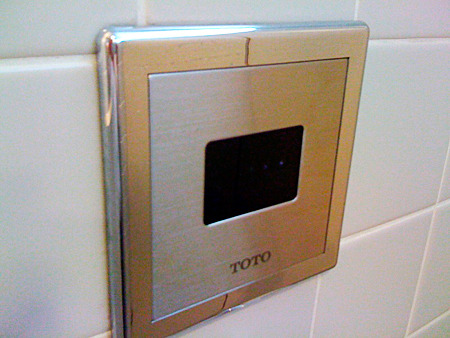
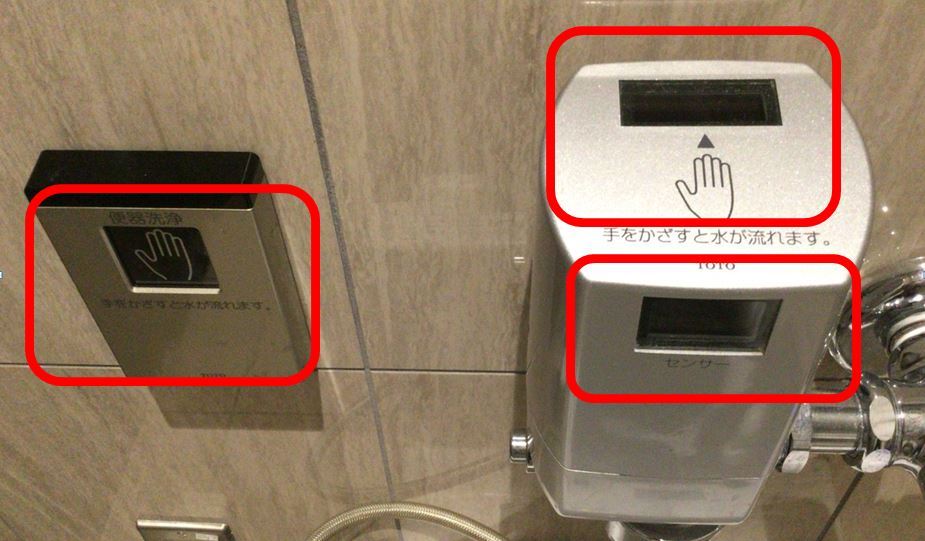
The most common types of flushing mechanisms you will encounter are likely to be wall-mounted. These are typically large round silver buttons or black sensors. To use the sensors, simply hold your hand over it until the toilet begins flushing.
If you're new to Japan or have just never known what the deal was with Japanese toilets, hopefully this was helpful to you. May you do your business in a stress-free fashion from now on!